
Identifying Common Roofing Problems Early: How to Spot Them
A well-maintained roof is essential for the safety and comfort of your home. Unfortunately, many homeowners overlook the importance of regular roof inspections until a problem becomes too big to ignore. Spotting roofing issues early can save you significant time, money, and hassle. By addressing problems as soon as they arise, you can prevent minor issues from turning into costly repairs or even a full roof replacement.
In this blog, we aim to equip you with the knowledge and tools needed to identify common roofing problems before they escalate. From simple visual checks you can do from the ground to more thorough inspections of your attic, we’ll cover a range of tips that will help you maintain your roof in top condition. Our goal is to help you protect your home by ensuring that your roof remains strong and durable for years to come.
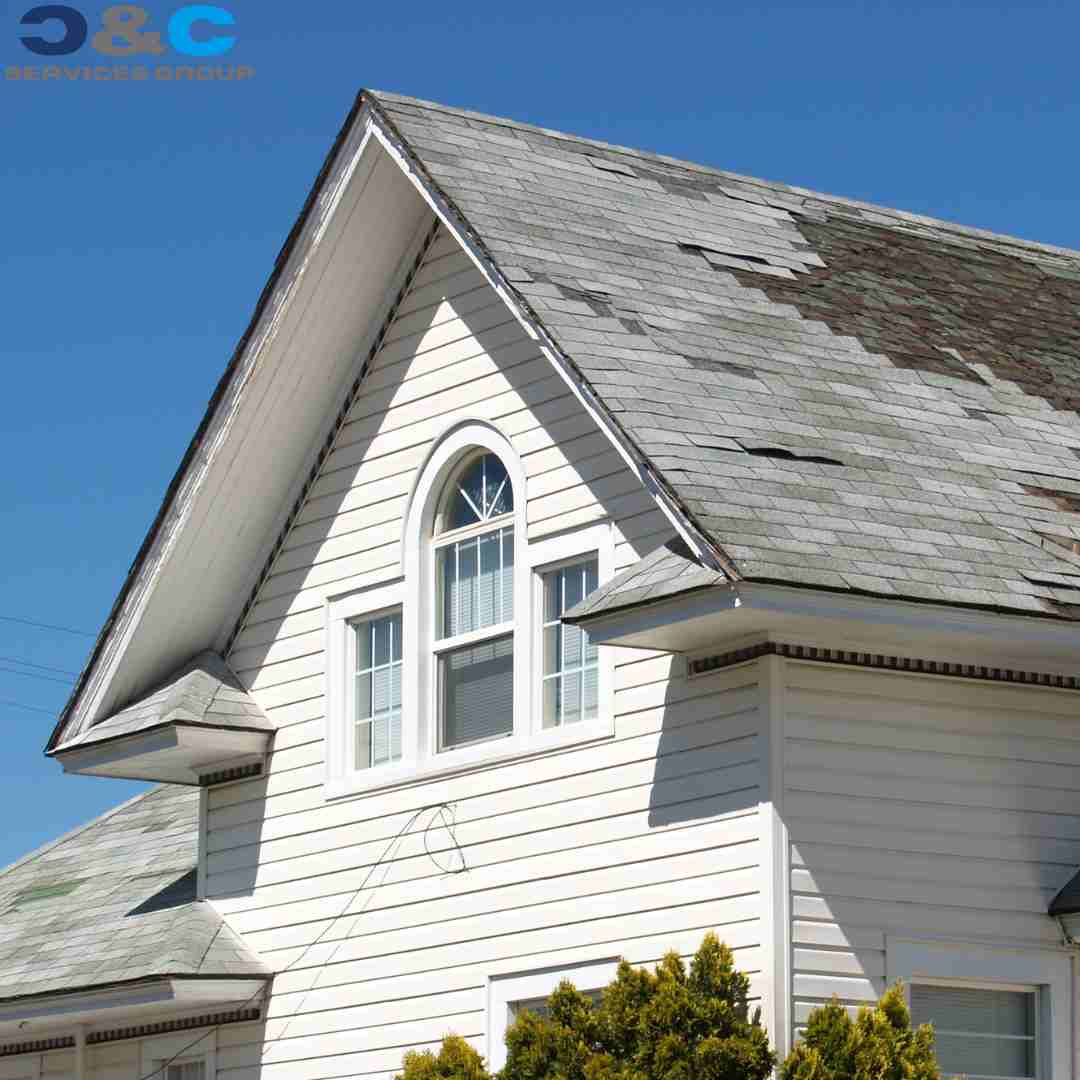
Visual Inspection from the Ground
Performing a visual inspection from the ground is a simple yet effective way to spot potential roofing problems early. You don’t need any special equipment or expertise to start. By taking a few minutes to look at your roof from the ground, you can identify visible signs of damage or wear that may require further investigation.
Begin by walking around your home and observing the roof from different angles. Look for any missing, cracked, or curling shingles. These are often the first indicators that your roof may need repair. Pay close attention to the areas around the edges of the roof and along the ridge line, as these are common spots for shingle damage.
By regularly conducting visual inspections from the ground, you can catch early signs of roofing problems and take action before they develop into more serious issues. This proactive approach can save you money and extend the lifespan of your roof.
Check for Roof Leaks and Water Stains
One of the most telltale signs of roofing problems is the presence of leaks and water stains inside your home. Water damage can manifest in various ways, and it’s crucial to detect these issues early to prevent extensive harm to your home’s interior.
Begin your inspection by examining the ceilings and walls of each room. Look for any discoloration, water stains, or peeling paint, which are clear indicators of water intrusion. These signs often appear as yellowish-brown spots or streaks. Pay special attention to corners and areas around windows, as these spots are prone to water leakage.
Addressing leaks as soon as they are discovered is essential to prevent further structural damage and mold growth. Even small leaks can lead to significant problems if left unattended. Regularly checking for roof leaks and water stains can help you maintain the integrity of your roof and protect your home from costly repairs.
By keeping an eye out for these signs and taking action when necessary, you can ensure your roof remains in good condition and your home stays dry and safe.
Inspect the Attic
The attic is a critical area for detecting roofing problems early, as it often shows signs of issues before they become visible elsewhere in your home. Regularly inspecting your attic can help you catch problems like leaks, mold, and structural damage at an early stage.
Accessing the Attic Safely
Before you begin your inspection, ensure that you have safe and easy access to your attic. Use a sturdy ladder and wear appropriate clothing, including gloves and a mask if necessary, to protect yourself from dust and insulation fibers. Make sure the area is well-lit, either by using a flashlight or ensuring that the attic’s lighting is sufficient.
Signs of Moisture
Once inside the attic, look for any signs of moisture or water damage. Check the underside of the roof decking and the rafters for water stains, which may appear as darkened wood or water streaks. These stains can indicate leaks that need immediate attention. Damp or wet insulation is another clear sign of moisture problems, which can lead to mold growth and reduce the effectiveness of the insulation.
Mold and Mildew
Mold and mildew thrive in moist environments and can quickly spread if not addressed. Look for any black, green, or white patches on the wooden structures or insulation. Mold can also produce a musty odor, which is a strong indicator of moisture issues. If you detect mold, it’s essential to identify and fix the source of the moisture and then remove the mold to prevent health hazards.
Ventilation Issues
Proper ventilation is crucial for maintaining a healthy attic environment and preventing moisture buildup. Check the attic vents to ensure they are not blocked by insulation or debris. Adequate ventilation helps regulate temperature and humidity levels, reducing the risk of mold growth and extending the lifespan of your roof.
Structural Integrity
Inspect the structural components of the attic, such as the rafters and trusses, for any signs of damage or deterioration. Look for sagging, cracks, or split wood, which could indicate structural issues that need to be addressed. Ensuring the structural integrity of your attic is vital for the overall health of your roof and home.
Regular attic inspections can help you spot roofing problems early and take action before they escalate. By maintaining a well-ventilated and dry attic, you can protect your roof and extend its lifespan. Make it a habit to check your attic periodically, especially after severe weather, to keep your home in top condition.
Look for Granule Loss
Granules play a crucial role in protecting your shingles from the elements, including UV rays, which can degrade the roofing material over time. Loss of granules is a common issue that can indicate aging shingles or damage, and spotting this early can help you maintain the integrity of your roof.
Understanding Granule Loss
Granules are the small, rough particles on the surface of asphalt shingles. They provide an extra layer of protection against the sun’s UV rays and weather elements. Over time, due to weathering or physical damage, these granules can begin to wear away. Significant granule loss reduces the effectiveness of the shingles, making your roof more vulnerable to leaks and other damage.
Checking Your Gutters and Downspouts
One of the easiest ways to check for granule loss is by inspecting your gutters and downspouts. After a heavy rain, take a look at the runoff water and any debris collected. If you notice a significant amount of granules accumulating in your gutters or at the base of your downspouts, it’s a sign that your shingles are shedding more granules than usual. This can indicate that your roof is aging or that the shingles have been damaged.
Inspecting the Roof Surface
Perform a close-up inspection of your roof’s surface, if it is safe to do so. Look for bare spots on the shingles where granules are missing. These areas will appear as dark patches or exposed asphalt, which can be a sign of worn-out shingles. Pay particular attention to areas that receive the most direct sunlight, as these are more prone to granule loss.
Understanding the Causes
Several factors can contribute to granule loss, including:
- Aging: As shingles age, they naturally lose granules.
- Weather: Hail, heavy rains, and strong winds can dislodge granules.
- Physical Damage: Foot traffic, fallen branches, or other physical impacts can knock granules loose.
- Poor Quality Shingles: Lower quality or improperly installed shingles may lose granules more quickly.
Preventative Measures and Solutions
If you detect granule loss, it’s important to determine the cause and take appropriate action. For minor issues, consider applying a roof coating to extend the life of the shingles. For significant granule loss, it might be time to consult a roofing professional to assess whether a repair or replacement is necessary.
Regular inspections and maintenance can help prevent excessive granule loss. Ensure your roof is clear of debris, trim overhanging branches, and avoid walking on the roof whenever possible.
By monitoring granule loss and addressing issues promptly, you can prolong the life of your roof and maintain its protective capabilities. This proactive approach will help safeguard your home from the elements and prevent costly repairs down the line.
Examine Flashing and Sealant
Flashing and sealant play vital roles in protecting the most vulnerable areas of your roof from water intrusion. Properly installed and maintained flashing helps direct water away from critical junctures, while sealant ensures a tight seal around roof penetrations. Regularly inspecting these components can prevent leaks and extend the life of your roof.
Understanding Flashing
Flashing is typically made from metal and is installed at various points on the roof where the shingles meet other materials, such as around chimneys, skylights, vents, and valleys. It acts as a barrier to direct water away from these junctions and prevent leaks.
Common Flashing Issues
Over time, flashing can become damaged or deteriorate due to weather exposure, poor installation, or age. Common issues to look for include:
- Rust and Corrosion: Metal flashing can rust or corrode, especially if it is made from lower-quality materials or if it has been exposed to harsh weather conditions.
- Cracks and Gaps: Flashing can develop cracks or gaps, which can allow water to seep through and cause damage to the underlying roof structure.
- Loose or Missing Pieces: High winds, heavy rain, or physical impact can cause flashing to become loose or even detach from the roof.
Inspecting Flashing
To inspect your flashing, start by visually examining the areas around chimneys, skylights, vents, and valleys. Look for any signs of rust, corrosion, cracks, or gaps. Ensure that the flashing is securely fastened and that there are no loose or missing pieces. Pay particular attention to any areas where the flashing appears to be lifting away from the roof surface.
Understanding Sealant
Sealant is used to create a watertight seal around roof penetrations, such as vents, skylights, and chimneys. It can also be applied to the edges of flashing to enhance its effectiveness. Over time, sealant can degrade due to exposure to the elements, causing it to crack or peel.
Common Sealant Issues
- Cracking and Peeling: Sealant can become brittle and crack or peel away from the surface, allowing water to penetrate.
- Shrinking and Gaps: Some sealants may shrink over time, creating gaps that compromise the watertight seal.
- Deterioration: UV rays and extreme temperatures can accelerate the deterioration of sealant.
Inspecting Sealant
Examine the areas where sealant has been applied, looking for any signs of cracking, peeling, shrinking, or gaps. Ensure that the sealant is intact and providing a continuous, watertight barrier. Pay special attention to the edges of flashing and around roof penetrations.
Maintenance and Repair
If you notice any issues with your flashing or sealant, it’s important to address them promptly. Small cracks or gaps in the sealant can be repaired with a high-quality roofing sealant. For more significant issues with flashing, consider consulting a professional roofer to assess the damage and make necessary repairs or replacements.
Regularly examining and maintaining flashing and sealant can prevent leaks and water damage, ensuring the longevity and effectiveness of your roof. By staying vigilant and addressing issues early, you can protect your home from costly repairs and maintain a safe, dry living environment.
Monitor for Algae and Moss Growth
Algae and moss growth on your roof can be more than just an aesthetic problem; it can also lead to serious damage if not addressed promptly. These organisms thrive in damp, shaded environments and can significantly reduce the lifespan of your roof if left unchecked. Regular monitoring and maintenance can help you keep your roof free from these damaging growths.
Understanding Algae and Moss
- Algae: Algae appear as dark streaks or stains on your roof. While primarily a cosmetic issue, algae can retain moisture on your shingles, leading to accelerated wear and tear.
- Moss: Moss is a green, fuzzy plant that grows in thick patches on your roof, particularly in shaded areas. Unlike algae, moss can physically lift and separate shingles from the roof deck, allowing water to penetrate and cause damage.
Why Algae and Moss Are Problematic
- Moisture Retention: Both algae and moss retain moisture, which can lead to the deterioration of shingles and other roofing materials.
- Structural Damage: Moss can grow under shingles, lifting them and creating gaps where water can seep in, leading to leaks and potential structural damage.
- Aesthetic Impact: Algae and moss can significantly detract from the appearance of your home, potentially lowering its value.
Inspecting for Algae and Moss
Regularly inspect your roof for any signs of algae and moss, especially after periods of wet weather. Look for dark streaks, green patches, and areas where shingles appear to be lifting. Pay special attention to the north-facing sections of your roof, which are more likely to be shaded and damp, creating ideal conditions for growth.
Preventing Algae and Moss Growth
- Trim Overhanging Branches: Ensure that branches and foliage are trimmed back from your roof to reduce shade and allow sunlight to dry the roof surface.
- Clean Gutters Regularly: Clogged gutters can retain moisture and promote the growth of algae and moss. Regularly cleaning your gutters will help keep your roof dry.
- Install Zinc or Copper Strips: Installing zinc or copper strips along the roof ridge can help prevent algae and moss growth. When it rains, small amounts of metal are released, which inhibit the growth of these organisms.
Removing Algae and Moss
If you already have algae or moss on your roof, it’s important to remove it carefully to avoid damaging the shingles:
- Algae: Use a mixture of water and mild bleach to clean the affected areas. Apply the solution with a sprayer, let it sit for about 15 minutes, and then gently rinse it off with a garden hose. Avoid using a pressure washer, as it can damage the shingles.
- Moss: For moss removal, use a long-handled brush to gently scrub away the moss. Be careful not to lift or damage the shingles. You can also use a moss-specific cleaner, following the manufacturer’s instructions.
Professional Assistance
For extensive algae and moss growth, or if you are unsure about tackling the job yourself, consider hiring a professional roofing contractor. They have the tools and expertise to safely and effectively clean your roof without causing damage.
By monitoring and addressing algae and moss growth promptly, you can maintain the integrity and appearance of your roof. Regular maintenance and preventative measures will help extend the life of your roofing system and protect your home from potential water damage.
Schedule Regular Professional Roof Inspections
While performing regular self-roof inspections and maintenance can help you catch many roofing problems early, scheduling professional inspections is crucial for ensuring your roof’s long-term health and performance. Roofing professionals have the experience, tools, and knowledge to identify issues that may be overlooked during a DIY inspection.
The Importance of Professional roof Inspections
Professional roofers can provide a thorough evaluation of your roof’s condition, identifying problems that may not be visible to the untrained eye. These inspections can help prevent minor issues from becoming major repairs, saving you money and extending the lifespan of your roof.
Frequency of Inspections
It is generally recommended to have your roof professionally inspected at least once a year. However, certain circumstances may necessitate more frequent inspections, such as:
- After Severe Weather: Strong winds, heavy rain, hailstorms, or snowfall can cause significant damage to your roof. Schedule an inspection after any severe weather event to assess and address any potential damage.
- Aging Roofs: If your roof is older, it may require more frequent inspections to monitor its condition and address age-related wear and tear.
What to Expect During a Professional Inspection
A comprehensive professional roof inspection typically includes the following steps:
- Exterior Examination: The roofer will inspect the exterior of your roof, looking for damaged, missing, or curling shingles, signs of granule loss, and the condition of flashing and sealant around roof penetrations.
- Interior Inspection: The attic and other interior spaces will be checked for signs of leaks, moisture, mold, and proper ventilation.
- Structural Assessment: The overall structure of the roof, including the integrity of the roof deck and supporting elements, will be evaluated.
- Detailed Report: After the inspection, the roofer will provide a detailed report of their findings, including any recommended repairs or maintenance.
Benefits of Regular Professional Inspections
- Early Detection of Problems: Professional inspections can catch issues early before they escalate into costly repairs or replacements.
- Peace of Mind: Knowing that your roof is in good condition provides peace of mind, especially during extreme weather conditions.
- Extended Roof Lifespan: Regular maintenance and timely repairs can significantly extend the life of your roof, protecting your investment.
- Insurance Compliance: Many insurance policies require regular roof inspections to remain valid. Keeping up with these inspections can ensure you remain compliant with your policy terms.
Choosing the Right Roofing Professional
When selecting a roofing professional for your inspections, consider the following:
- Experience and Certification: Ensure the roofer is experienced and certified by relevant industry organizations.
- Reputation: Look for reviews and testimonials from previous clients to gauge the quality of their work.
- Comprehensive Services: Choose a roofer who offers a range of services, including repairs and maintenance, to address any issues found during the inspection.
Maintaining a Schedule
Set reminders for your annual roof inspections and keep a record of all inspection reports and any work performed. This documentation can be valuable for insurance claims and future home sales.
Conclusion
Scheduling regular professional roof inspections is a proactive approach to maintaining your roof’s health and protecting your home. By combining professional expertise with your routine self-inspections, you can ensure your roof remains in optimal condition, providing lasting protection and peace of mind.